This article is all about the Programing of Raspberry Pi Pico using C. We have explained all steps of ” How to program Raspberry Pi Pico using C” and how to download the programing language (for example, Raspberry Pi Pico’s C SDK) and its model given from Github.
Further sub-topics are also explained for knowledge, such as installation of all necessary tools, creating the Blinky C Program, and uploading the UF2 file to Pico and its working Examples.
Have You Read These?
For best results, you should go through two other Articles named” Getting Started with Raspberry Pi Pico “and “Programming Raspberry Pi Pico with MicroPython”.
We strongly prefer you to read the above-given articles for better understanding and to know more about Raspberry Pi Pico C SDK.
Getting Started with Raspberry Pi Pico C SDK
Writing C programming language will be easier for those who have graduated from old-school hardware engineering and gained experience in writing firmware. These students are more experts in programming C language than Python or MicroPython firmware writings. For information purposes,” MicroPython is written in C”.
The Raspberry Pi Foundation promotes Python as the initial programming language. But things get complicated in the case of MicroPython for all Raspberry Pi SBCs.
In the list of high programming languages, “C “is considered low among them. For a complete grip over hardware gain knowledge about all programming languages, C language will be the easiest option. C language is also considered for the programming of microcontrollers and embedded systems.
In promoting and investing in MicroPython, the Raspberry Pi Foundation invented SDK (Software Development Kit) for C / C++ programming languages to create applications for RP2040-based boards. The RP2040 Microcontroller-based Raspberry Pi Pico is no exception for it.
Now let’s come toward Programming Raspberry Pi Pico using C language.
Which Computer is used?
In the “Programming Pico with MicroPython” article, it is already explained in detail. Still, for the reminder, Any Computer based on Linux, Windows,s or Mac system can be used. Still, the best option is Raspberry Pi Computers; the Raspberry Pi Pico focuses on the Raspberry Pi OS as the primary host.
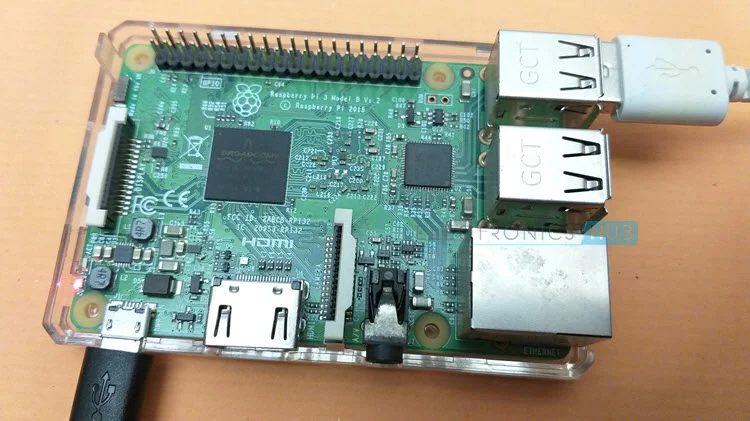
If the latest Raspberry Pi 4 SBC is unavailable, you can use the previous version of Raspberry Pi 3 Model B. Now getting started with C SDK, use Raspberry Pi to create applications for Pico.
Note: In the future, we will provide another article based on working with other systems like Windows, Visual Studio Code, etc., and their environments.
Get Pico’s C SDK and Examples
- Log in to Pi using SSH or VNC. For best results connect Pi to a monitor.
- Use the VNC viewer for opening the desktop of Raspberry Pi.
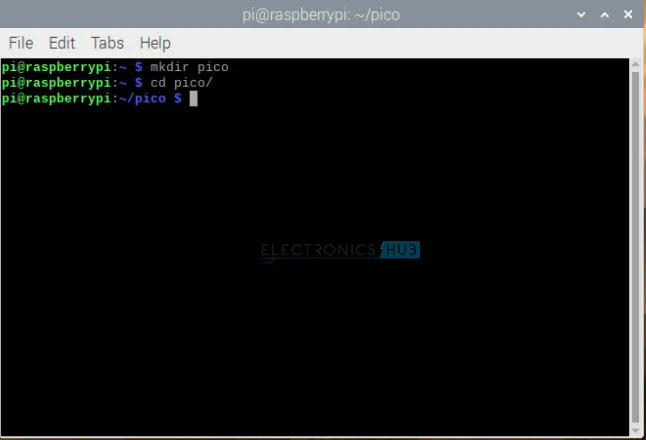
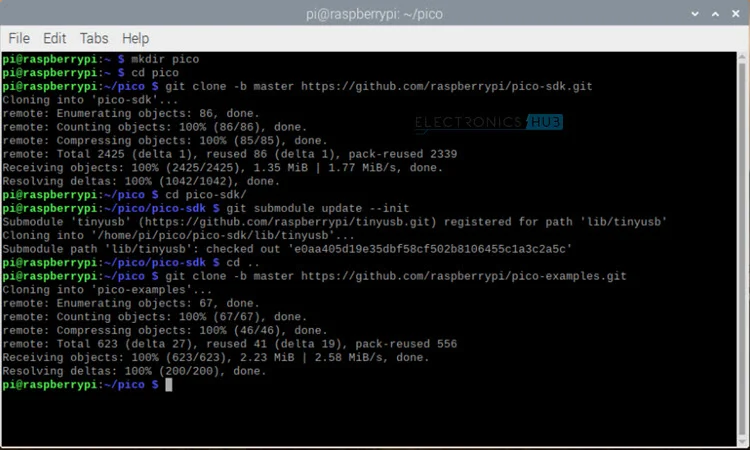
- Now Open the terminal and create a directory called ‘pico’ at /home/pi/pico.
- then Add the given commands step by step.
cd ~/mkdir picocd picoDownload Examples
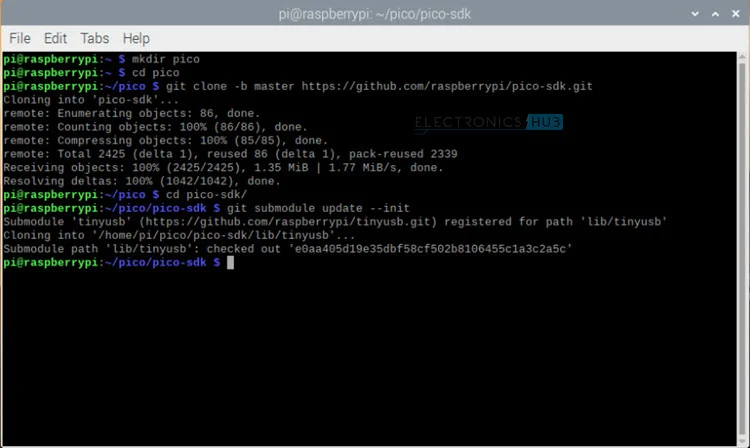
The official repository for Pico’s C SDK is https://github.com/raspberrypi/pico-sdk. Copy this repo to your fresh-made ‘pico’ directory using the commands step by step.
cd ..Git clone -b master https://github.com/raspberrypi/pico-sdk.gitThis will develop a pico-SDK directory inside the ‘pico’ directory.
Before moving forward toward Downloading step, initialize the ‘tiny USB’ submodule in the ‘pico-SDK for USB functions like USB CDC Serial to work.
Now open the ‘Pico- SDK’ directory and initializing the USB submodule using the given commands.
cd pico-sdkgit submodule update – -initInstalling the Toolchain
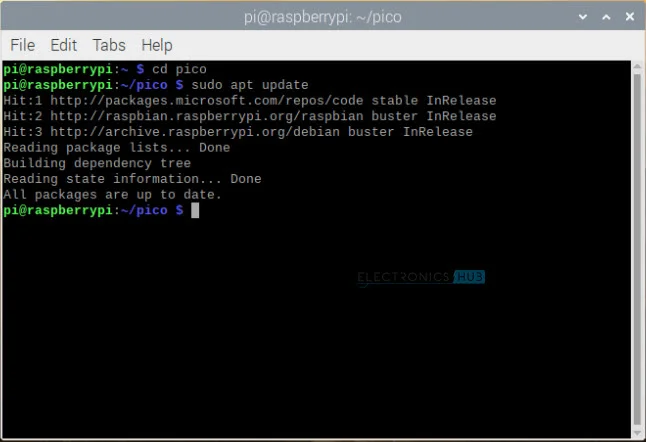
Just downloaded the C source files for Pico. To compile and build these files, additional tools like ARM GCC Compiler, ARM Cortex libraries, CMake build tool, etc, are needed. All these tools can be installed using ‘apt’. Now update the package index using the ‘update’ command.
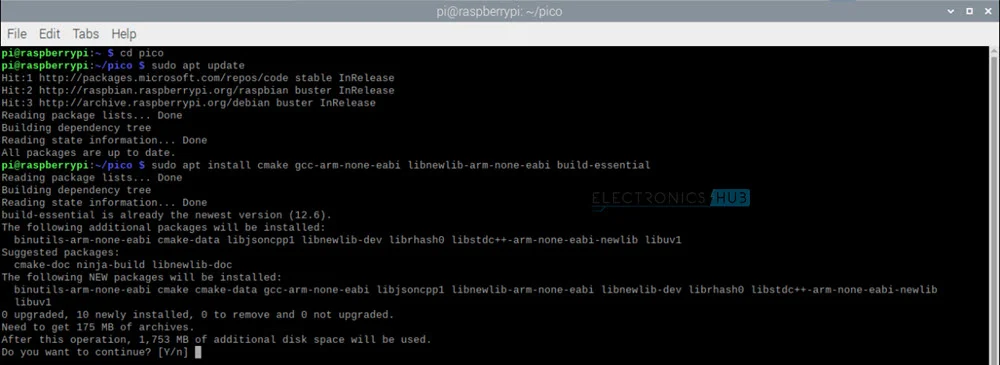
sudo apt updateNow, install the necessary tools to write the given commands. If any of these tools are installed, ‘apt’ will not install them again.
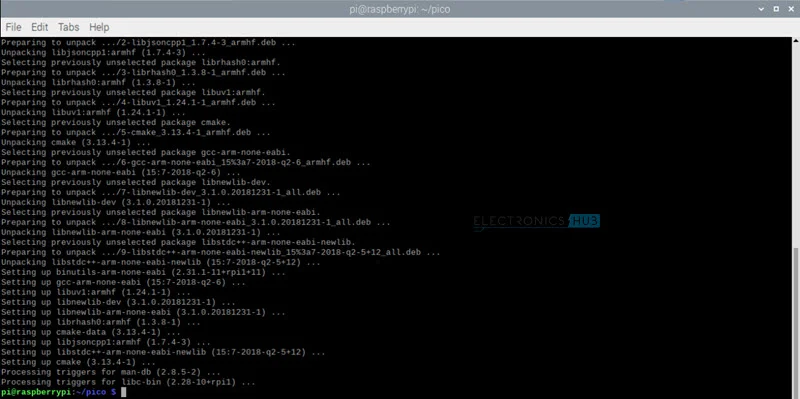
sudo apt install cmake gcc-arm-none-eabi libnewlib-arm-none-eabi build-essentialAlso, A bit of time for is needed completion of installation so Grab a cup of coffee and relax.
Exploring Blink Example
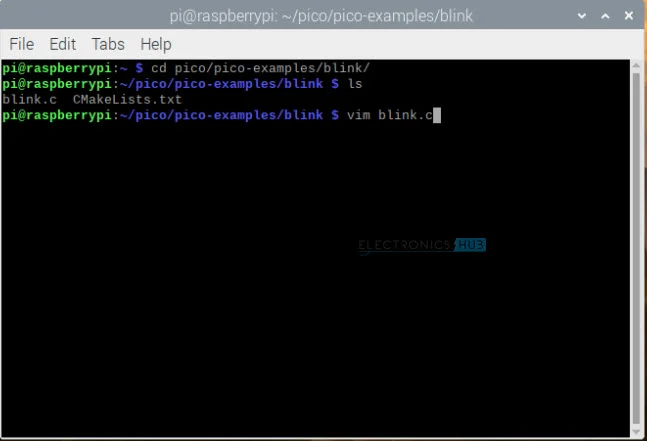
Let’s see the first C example program, which is known as the ‘Blink’ program. Now click on the ‘pico’ directory, and open the ‘pico-examples’ directory. This directory consists of different examples of different peripherals and modules. Now Open the blink directory.
cd pico-examples/blinkNow the ‘blink.c source code for blinking the onboard LED. Open it, use an editor like ‘vim’. If ‘vim is not installed then install it using Sudo apt install vim command.
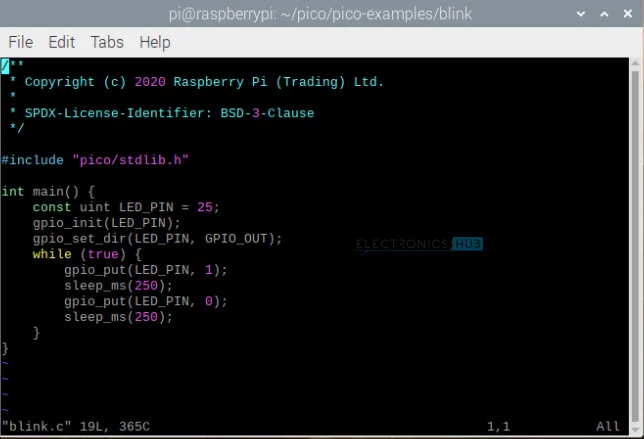
vim blink.cElectronichub had created a copy of the code and added comments for easy understanding.
/**
 * Copyright (c) 2020 Raspberry Pi (Trading) Ltd.
 *
 * SPDX-License-Identifier: BSD-3-Clause
 */

#include "pico/stdlib.h"

int main() {
    const uint LED_PIN = 25; /* On-board LED. Connected to GPIO 25 */
    gpio_init(LED_PIN); /* Initialize GPIO function on the Pin */
    gpio_set_dir(LED_PIN, GPIO_OUT); /* Set the Pin as Output */
    while (true) {
        gpio_put(LED_PIN, 1); /* Make the GPIO Pin HIGH */
        sleep_ms(250); /* Delay of 250ms */
        gpio_put(LED_PIN, 0); /* Make the GPIO Pin LOW */
        sleep_ms(250); /* Delay of 250ms */
    }
}
Raspberry-Pi-Pico-C-Blink.c hosted by GitHub
Build the Blink
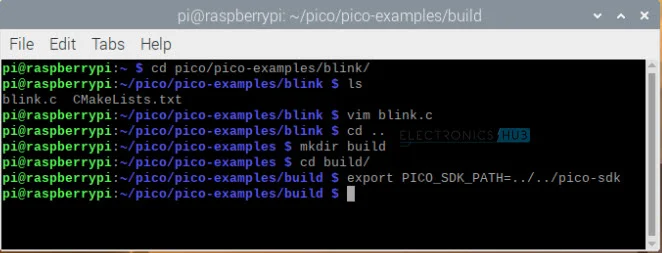
Now return to the ‘pico-examples’ directory and create a new directory called ‘build’. This directory consists of all the CMake build files for all the example projects. Now Open the newly developed ‘build’ directory.
cd ..mkdir buildcd buildExport the path for pico-SDK by writing the given commands.
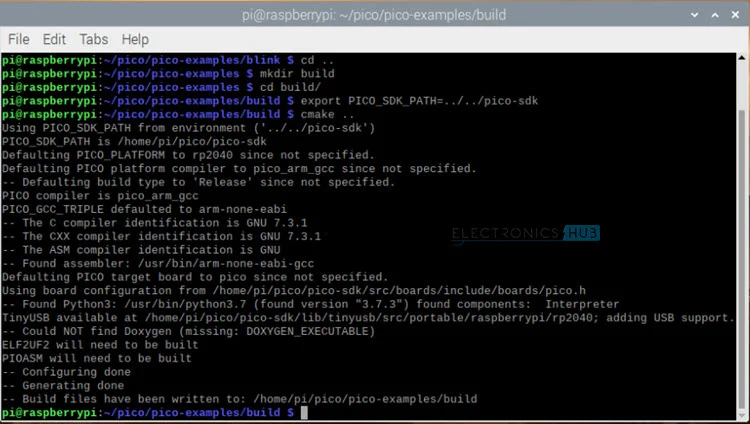
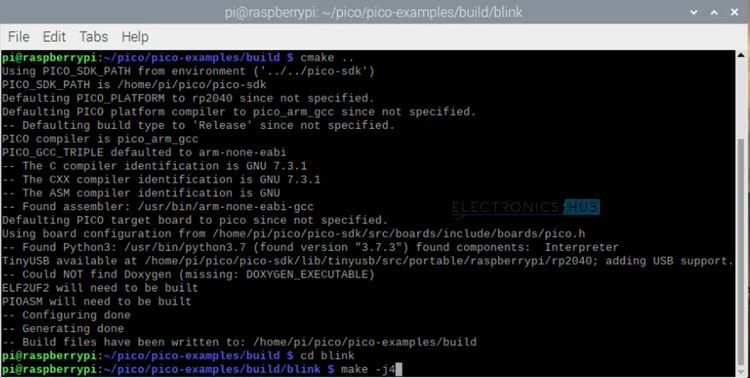
export PICO_SDK_PATH=../../pico-sdkIt’s now ready to run the command CMake to prepare the build directory.
cmake ..The ‘build’ directory consists of all the build-related files for all the examples. But we want only the blink example. Let’s create an example by writing the blink command. Now open the ‘blink’ directory in the ‘build’ directory and make the files.
cd blinkmake -j4Note: The ‘-j’ option work is to specify the numbers to do the job perfectly. As the Raspberry Pi 3 had a quad-core CPU, so select 4 important jobs.
The command ‘make’ will combine all the important files and will create a group of binary files.
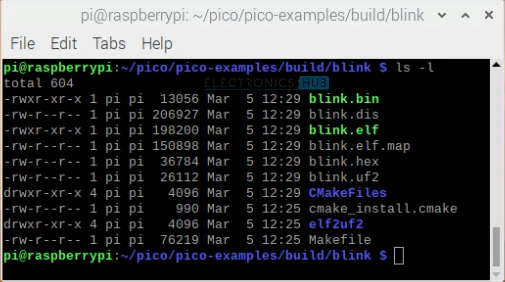
Make a list of the contents for the ‘blink’ directory in the ‘build’ directory, and then the bunch o files will be generated.
The most important file is‘.uf2’ named ‘blink.uf2’. In the MicroPython Article, this file is formatted from the MicroPython binary, and it can be easily uploaded to Raspberry Pi Pico. The easiest method is just by dragging and dropping (set the Pico in bootloader mode afterwards).
Load the Blink and Run it
The easiest way to use Raspberry Pi Pico to upload the file is as follows:
Just the file to Bootloader mode. It will mount the Pico as a USB Mass Storage Device. Then easily drag and drop the blink.uf2 file.
To set the Pico in Bootloader mode, follow the steps:
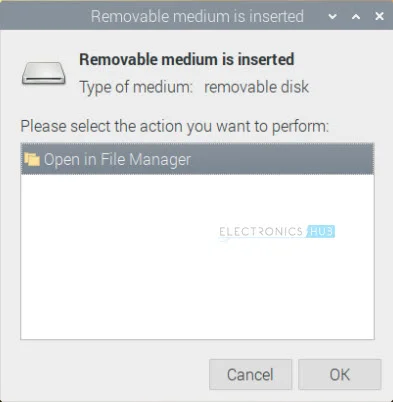
First, attach the micro USB cable to Raspberry Pi Pico and hold the ‘BOOTSEL’ button while attaching the cable to Raspberry Pi (or the host computer). The Pico will automatically mount as a mass storage device.
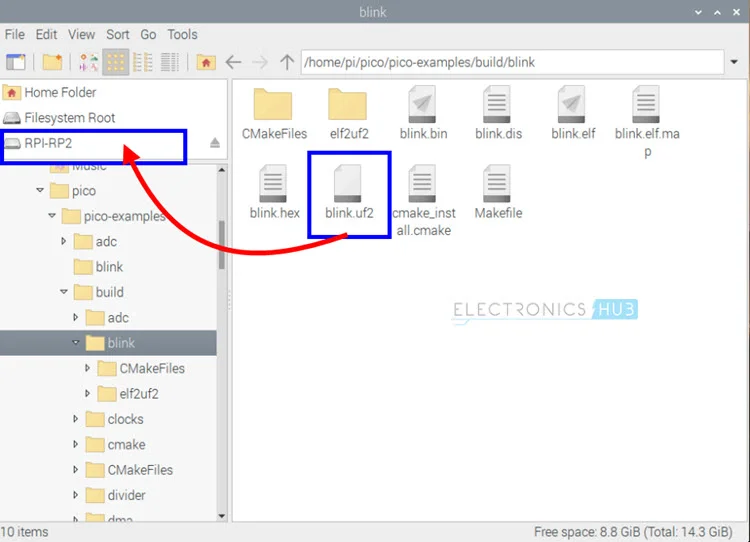
Open the file manages, then search pico/pico-examples/build/blink directory. Just drag and drop the ‘blink.uf2’ file onto Pico. The Pico will start resetting and will get detached from the computer and the LED will start blinking.
Bonus: Alternative to Unplugging and Plugging USB Cable
Are you fed up with restarting Raspberry Pi Pico each time after uploading it to the Bootloader mode?
If your answer is yes, then here is a method; by following it, you don’t have to do Plugging and Unplugging each time after uploading a program to Pico.
The process of Plugging and Unplugging is actually resetting Pico. If there’s another method to reset Pico while keeping the Pico Plugged into the computer, then use it.
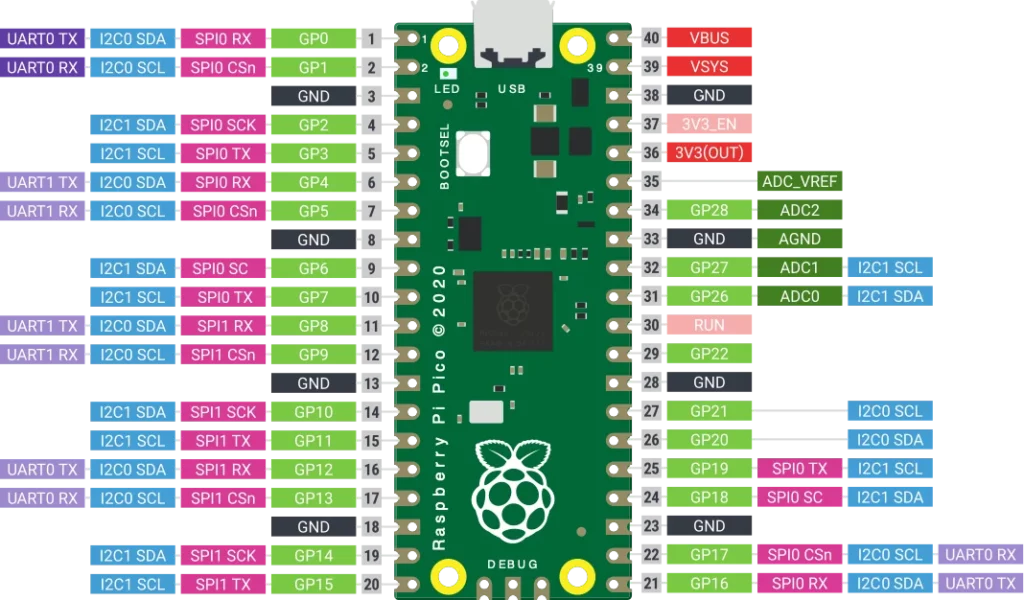
Given below is one of the simplest and easiest ways to reset Pico. Suppose you had studied the Pinout of Raspberry Pi Pico. There is a small pin number 30 known as ‘RUN.’
That pin is actually the global reset pin of the RP2040 Microcontroller. If this pin is pulled down, the RP2040 microcontroller will start resetting.
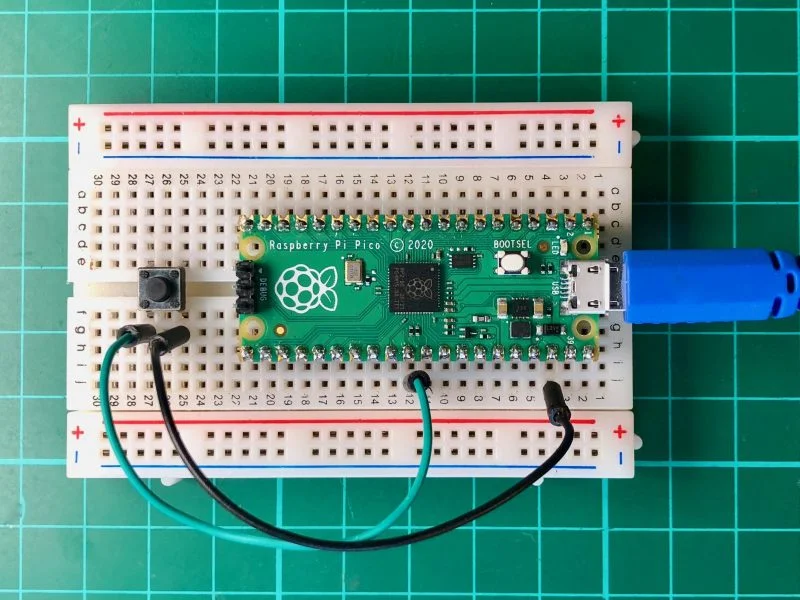
So, At first, attach a push-button between the RUN pin and GND. Whenever the button is pushed, the microcontroller will start resetting. Let’s name this button as “Reset Button”.
Now to convert the Raspberry Pi Pico to Bootloader Mode, follow the given steps:
1: At first, push and then hold the resetting button and BOOTSEL Button. Now slowly release the Reset button and then release the BOOTSEL button after a second
That’s all; now the Pico is in Bootloader Mode. It can also keep the USB Cable and the host computer connected to Pico.
As you have learned, now you can easily reset and also convert Pico to Bootloader mode. For Resetting Pico, only just press the Reset Button once and then release it.
Conclusion
It’s a complete guide for beginners. After reading, you will be able to understand what is Raspberry Pi Pico C Programming language and how it’s downloaded.
For any difficulty, feel free to comment down below and also give us feedback about our article through comments.





is this Pico SDK usable on Rasberry pi 4? I mean can I run any generated blink file on Rasberry pi 4?
yes you can try it.