
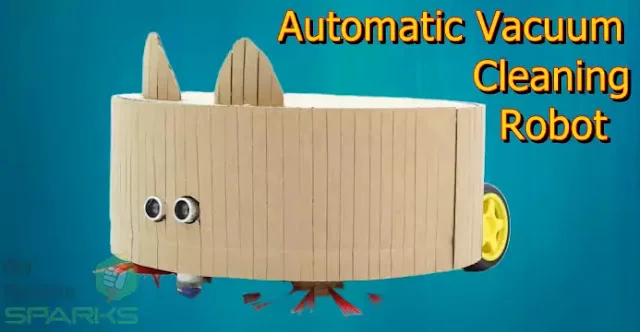
A Cost-Efficient Solution for Home Cleaning A clean and tidy home is essential for a healthy living environment, but cleaning can be tiring and time-consuming. With the advent of technology, cleaning tasks can now be done quickly and efficiently. One such device that has made house cleaning much more accessible is the Automatic Vacuum Cleaning Robot.
What is an Automatic Vacuum Cleaning Robot?
The Automatic Vacuum Cleaning Robot is an innovative device designed to automate home cleaning. With this device, homeowners can say goodbye to manual cleaning as the robot can clean their floor automatically without any human intervention. The device works on its own and only needs to be placed on the floor, and it will take care of the rest.
Cost-Efficient and Convenient:
The Automatic Vacuum Cleaning Robot is built to be cost-efficient, making it accessible to almost everyone. The device costs less than $20 and can work for nearly 4 hours when fully charged. The robot consists of an Arduino board and motors, making it a cost-effective solution for home cleaning.
Components Required:
The components required for the Automatic Vacuum Cleaning Robot are as follows:
| Components Required | Order Online from Amazon |
|---|---|
| Motor Driver L298n | Click here |
| Arduino Uno | Click here |
| Ultrafire Battery 18650 3.7V | Click here |
| Jumper wires | Click here |
| DC Motors (x5) | Click here |
| Wheel 65 x 26mm (x2) | Click here |
| Switch | You can use any kind of switch as explained in the circuit design |
Circuit Diagram:
The circuit diagram for the Automatic Vacuum Cleaning Robot is straightforward to understand. The wires are connected according to the chart, and the Arduino code is also provided for easy implementation.

Working of the Robot:
Step-by-Step Procedure for Building the Robot:
The building process of the Automatic Vacuum Cleaning Robot is explained in detail below:
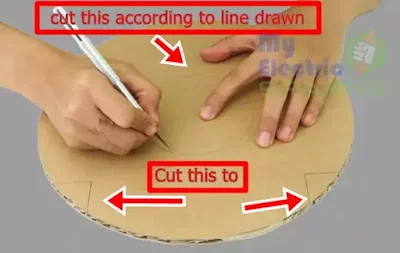
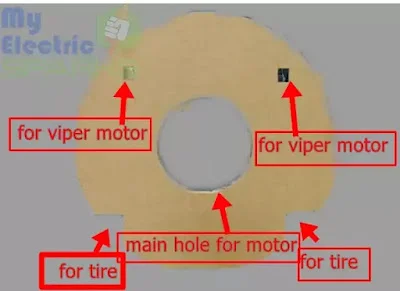
Step 1:
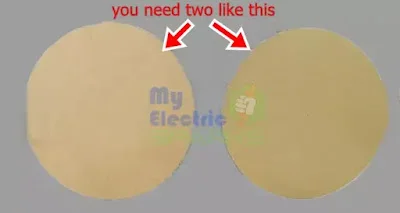
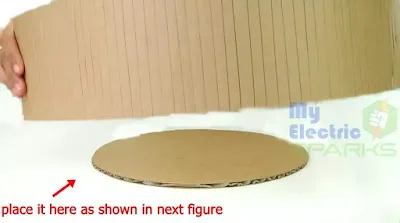
Arrange two cardboard pieces, and make a circle of a fixed length. Cut both boards carefully, as per the diagram.
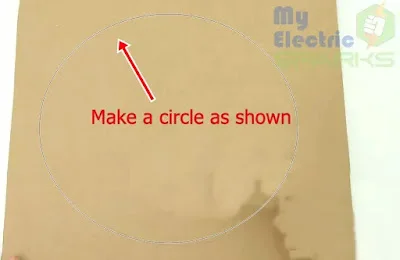
- The process you make should be large enough to accommodate the motors and other components of the robot.
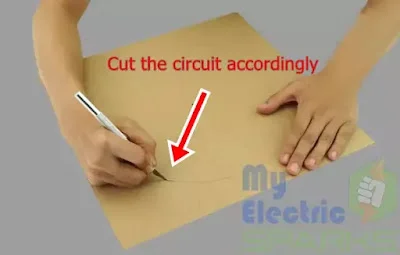
Step 2:
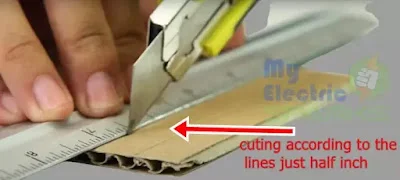
Cut both the councils to equal length, and arrange another board that is large in size and significant in length.
- Make lines with equal distance between them, and cut each line, making sure not to miss it entirely.
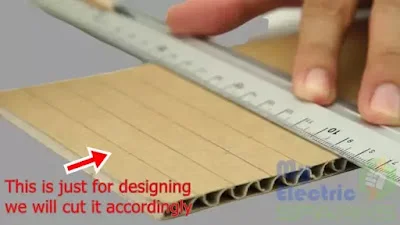
- These lines will serve as the base structure for the robot.
Step 3:
Place the cut cardboard pieces on the large board, and stick it with glue. 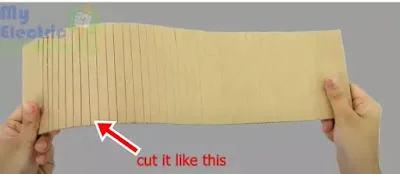
- Make sure the cardboard pieces are placed parallel and equal to the center. The next step will be to put tires and motors.
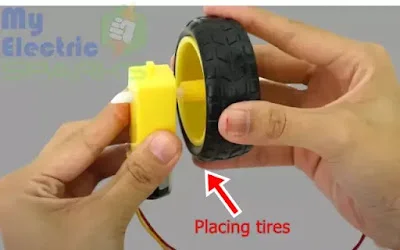
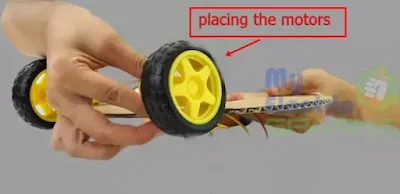
Step 4:
- Wire the motors and place the tires per the diagram.
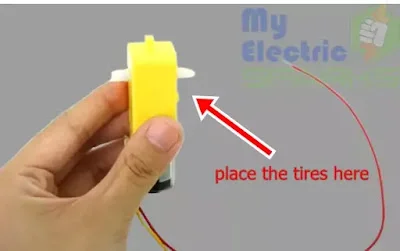
- Ensure the engines face the same direction and are correctly connected to the motor driver L298n.
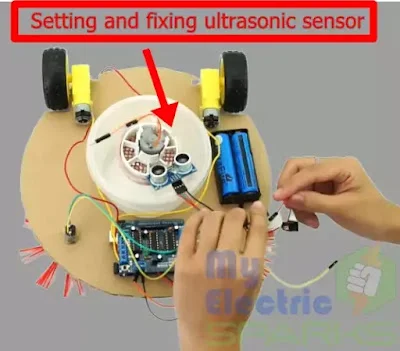
- After the tires wiring, wire up the Ultrasonic sensor according to the circuit diagram.
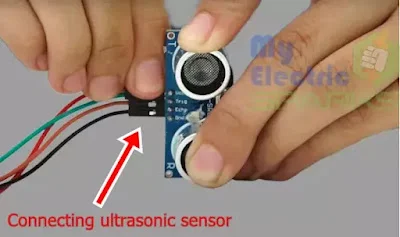
- The ultrasonic sensor will help the robot navigate and avoid obstacles.

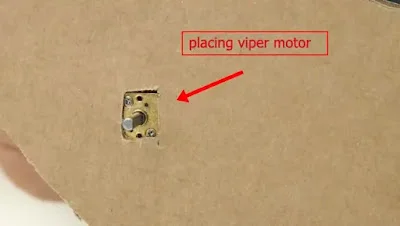
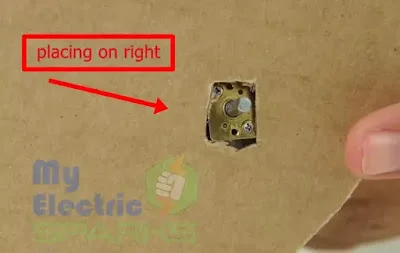
Step 5:
- then make two cuts for the wiper motors.
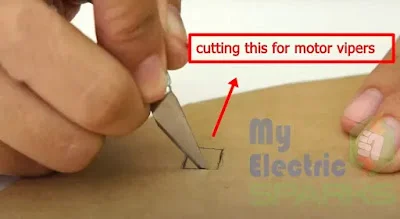
- Fix the tires and wiper motors on the left and right sides of the robot.
- The wiper motors will clean the surface, and the holes you cut will allow the wipers to move freely
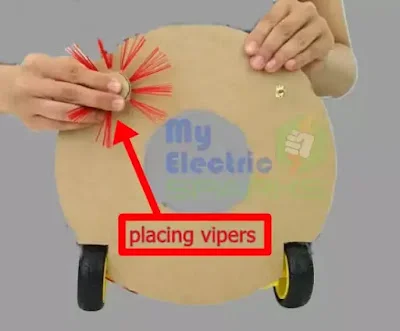
Step 6:
The last step is to make self-made wipers, the diagram for which is provided. The wipers can be made from any flexible material like rubber or foam.
- This image shows the Right side of the wiper motor.
- For making self-made wipers, the diagram is shown below.

Attach the wipers to the wiper motors, and make sure they move smoothly and evenly.
Step 7:
Assemble the rest of the components, including the battery, switch, and Arduino Uno. Connect all the details per the circuit diagram, and ensure everything is connected correctly.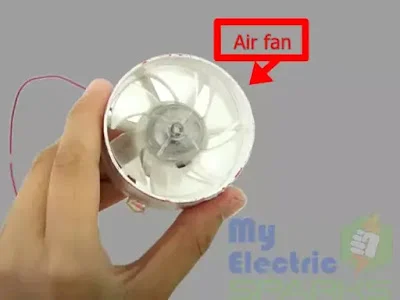
- Protect the machinery by enclosing it with a protective mesh material to prevent damage.
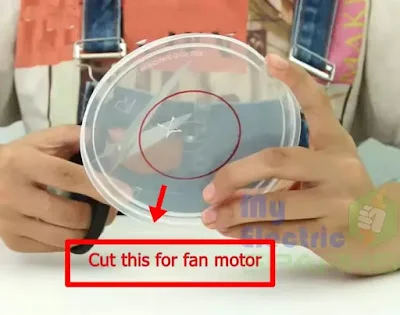
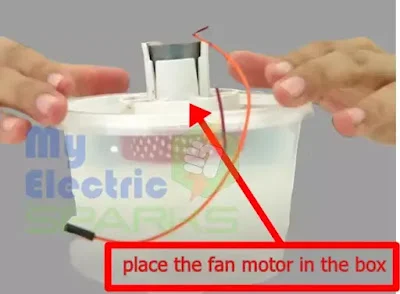
- Utilize plastic containers or any readily available plastic material to build the Automatic Vacuum Cleaning Robot. Cut the containers into circular shapes matching the size of the motor as the fan will be placed on it. Correctly install the fan.
- Correctly install the fan.
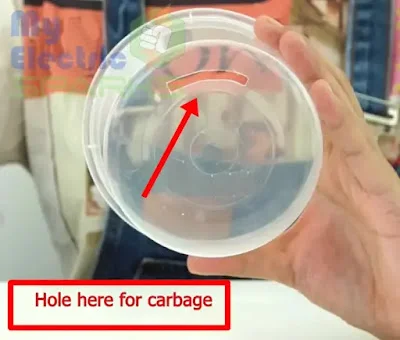
- For the debris catcher and wiper motor, ensure an opening for particles to easily pass through and reach the bucket, as shown in the diagram.
Step 8:
Finally, write a code for the robot using the Arduino software, and upload it to the Arduino Uno. Test the robot to ensure it works as expected, and make any necessary adjustments to the code or circuit.
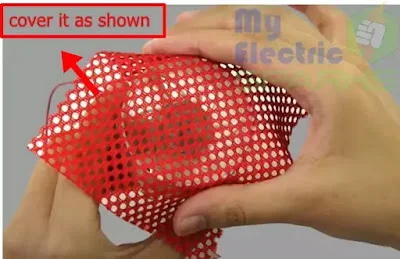
Now place the box over it and cover it as shown below.
- You will have successfully built your own Automatic Vacuum Cleaning Robot following these steps
Acquire the Code:
- Before testing the Automatic Vacuum Cleaner Robot, installing the Code onto the Arduino is essential. Please download the Code from the provided link Click here for Arduino Code.
Frequently asked questions related to the Automatic Vacuum Cleaning Robot:
Q: What is the Automatic Vacuum Cleaning Robot?
A: The Automatic Vacuum Cleaning Robot is a cost-efficient and convenient home cleaning solution that can be built using a simple circuit design and easy-to-follow instructions.
Q: How does it works?
A: The Automatic Vacuum Cleaning Robot uses a combination of hardware components, such as motors, wheels, sensors, and software code, to navigate and clean space.
Q: Is it challenging to build the Robot?
A: No, the building process is straightforward to follow, making it accessible for people with varying levels of technical expertise.
Q: Is the Robot expensive to build?
A: No, it is a cost-efficient solution for home cleaning, as the required components can be easily obtained online at an affordable price.
Q: What components are required to build the Robot?
A: The components required to build the robot include a motor driver, an Arduino Uno, an Ultrafire Battery 18650 3.7V, jumper wires, DC Motors, wheels, and a switch.
Q: How do I download the Robot code?
A: The code can be downloaded from a specified link. It is essential to install the code in the Arduino before testing the robot.
In conclusion:
The Automatic Vacuum Cleaning Robot represents a practical and cost-effective solution for household cleaning tasks. With its straightforward circuit design and instructions, homeowners can quickly assemble it, providing them with a convenient and efficient tool to keep their homes tidy.


Thanks so much for the post.Much thanks again. Really Cool.