
As our population continues to grow, so does our problem with pollution. Garbage can be seen piling up in urban and rural areas, leading to a severe problem of land pollution. Dustbins, Garbage bins, Trash Cans, or whatever you call them, are small plastic or sometimes metal containers used to store trash or waste temporarily.
They are usually spotted at homes, offices, streets, parks, etc., to accumulate junk. In some areas, the government has placed waste containers for public use, which is the only way to overcome pollution, as it causes many problems. Still, whatever the case is, this is the only solution to keep the garbage stored. This project is constructed with a simple system called Smart Dustbin using Arduino, Ultrasonic Sensor, and Servo is also inserted, which opens the head of the dustbin automatically without human interaction.
Smart Dustbin Technology
The Smart Dustbin is a sensor-based circuitry that works automatically. It opens up when it detects the presence of garbage nearby and closes automatically after a few seconds. This project uses Arduino technology, and the components used include the HC-04 ultrasonic sensor and the servo motor. It is a simple and easy technique that costs around $2.
“Our aim was to create a solution to land pollution that is not only efficient and cost-effective but also easy to use for everyone. We are proud of the progress we have made so far and are excited to see the impact it will have on the environment.”
This innovation is a game-changer for households, offices, and city areas with a high population rate. With the Smart Dustbin, there is no need for human interaction to open it up by pushing its button with the feet. Instead, it is designed to detect any human legs, hands, or objects near it and generates a signal to open up automatically. This ensures the dustbin is always ready to receive waste, making it more efficient and convenient.
- Smart Dustbin Technology
- Smart Dustbins using Arduino: Revolutionizing Waste Management with Ultrasonic Sensors and Servo Motors
- How the Smart Dustbin Works
- Building a Smart Dustbin: Required Components and Step-by-Step Process
- Circuit Diagram:
- Code Of Arduino:
- The process of making a Smart dustbin:
- How the Smart Dustbin Works
- Applications of Smart Dustbin
- More Stories:
Smart Dustbins using Arduino: Revolutionizing Waste Management with Ultrasonic Sensors and Servo Motors
In an era where technology is taking over every aspect of our lives, it is no surprise that it has found a way to revolutionize waste management. Smart Dustbins using Arduino has become the new solution with the rise of environmental concerns and the need for efficient waste disposal.
“The hands-free experience provided by these dustbins eliminates the need for human interaction, which is critical in a post-pandemic world.”
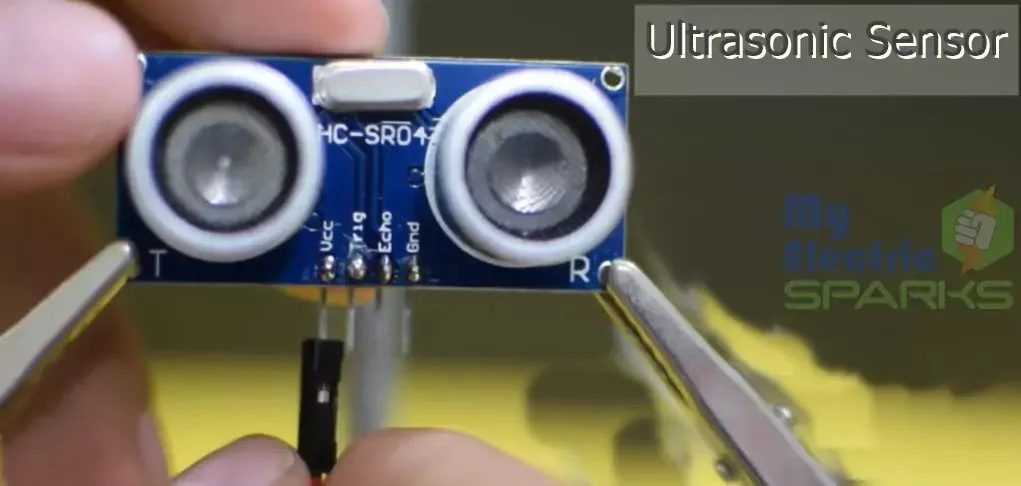
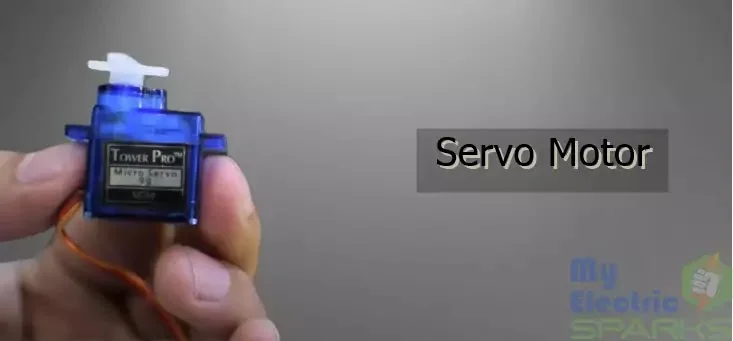
The dustbin is equipped with an Ultrasonic Sensor and Servo Motor that detects and open the lid automatically, making it a hands-free experience. Ultrasonic sensors and servo motors have become critical components in electronic engineering. The technology behind Smart Dustbins is based on object detection using Arduino, a simple and easy-to-implement device.
“Smart dustbins are a step towards creating smart cities and promoting sustainability.”
The same technology is used in Object Avoiding Robots, where an intelligent car detects an object and changes its position automatically to avoid a collision. In this project, the Ultrasonic Sensor is placed on top of the dustbin, and when it detects an object, like a human hand, it triggers the Arduino to open the lid.
“This technology not only makes waste disposal more efficient, but it also helps to reduce the spread of diseases,”
The implementation of Smart Dustbins using Arduino has seen significant growth in recent years, with governments and organizations investing in these waste management solutions. With the advancement in technology, it is expected that Smart Dustbins will become a household name and a key player in the fight against pollution.
How the Smart Dustbin Works
Once set up and programmed, the smart dustbin works efficiently to make waste disposal hassle-free. After all the necessary connections have been made and the code uploaded to the Arduino, power is supplied to the circuit. The ultrasonic sensor continuously works to detect any object nearby, measuring the distance to check if it is less than the predefined value. If an object is detected, such as a hand or leg of a human being or any other thing, a signal is sent to the motor. The motor is activated, and the head of the dustbin, which is attached to the servo motor, is opened by the Arduino. After a few seconds, the head of the dustbin will automatically close because of the predefined value that can be easily changed. This process ensures that waste disposal is made easy and convenient for everyone.
Building a Smart Dustbin: Required Components and Step-by-Step Process
Smart Dustbins are the future of waste management, and the best part is that they are easy to build using a few essential components. These components are readily available in the above given links, making building your own Smart Dustbin easy.
Once you have all the necessary components, the next step is to start building. The procedure category explains the step-by-step process, where you will learn how to assemble the components and program the Arduino to open the dustbin lid automatically when a hand is detected. With this project, you can contribute to keeping the environment clean and safe, one step at a time.
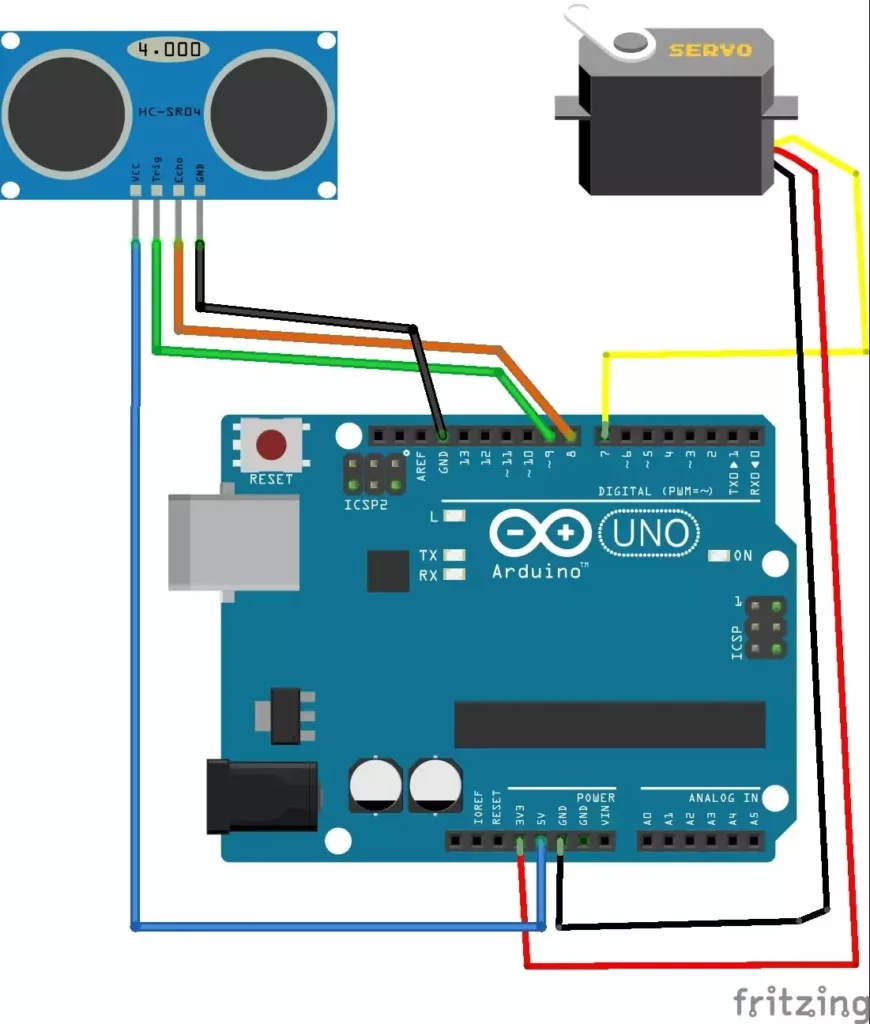
Circuit Diagram:
The circuit diagram is shown below, and the wiring is also discussed in the procedure section.
Note: Step by step procedure is given below. Make sure to have the same components above to make a smart dustbin.
Code Of Arduino:
//define Pins
#include <Servo.h>
Servo servo;
int trigPin = 9;
int echoPin = 8;
// defines variables
long duration;
int distance;
void setup()
{
servo.attach(7);
servo.write(0);
delay(2000);
// Sets the trigPin as an Output
pinMode(trigPin, OUTPUT);
// Sets the echoPin as an Input
pinMode(echoPin, INPUT);
// Starts the serial communication
Serial.begin(9600);
}
void loop()
{
// Clears the trigPin
digitalWrite(trigPin, LOW);
delayMicroseconds(2);
// Sets the trigPin on HIGH state for 10 micro seconds
digitalWrite(trigPin, HIGH);
delayMicroseconds(10);
digitalWrite(trigPin, LOW);
// Reads the echoPin, returns the sound wave travel time in microseconds
duration = pulseIn(echoPin, HIGH);
// Calculating the distance
distance= duration*0.034/2;
// Prints the distance on the Serial Monitor
Serial.print(“Distance: “);
Serial.println(distance);
if ( distance <= 25 ) // Change Distance according to Ultrasonic Sensor Placement
{
servo.write(0);
delay(3000);
}
else
{
servo.write(90);
}
}
The process of making a Smart dustbin:
At first, I set up all the components to build a smart dustbin using Arduino. First of all, start with the Arduino Uno, then the Motor, and learn how to program the machine to open the head of the smart dustbin. If you are thinking about implementing the idea of how to open the head or box of the dustbin using a servo motor, follow the steps carefully.
suggested: Build Your Own Automatic Vacuum Cleaning Robot: Step-by-Step Guide
Start from a simple Arduino and use the same coding attached in the Article.

Now connect Ultrasonic Sensor with Arduino. Follow given steps below.
Connect the Vcc pin to the 5v(Vcc) of Arduino.
Connect the Trig pin to 9 pins of Arduino.
Connect the Echo pin to 8 pins of Arduino.
Setting up the Servo Motor for Smart Dustbin
Connect the servo motor’s ground wire to the Arduino’s ground pin.
Connect the servo motor’s Vcc wire to the Arduino’s 5v(Vcc) pin.
Connect the signal wire of the servo motor to the 10th pin of the Arduino.
Once the connections are made, you can write the code to control the servo motor and open the dustbin lid.
Following these simple steps, you can easily set up the servo motor for your smart dustbin project.
Fixing the Ultrasonic Sensor
To fix the ultrasonic sensor, you need to follow the below steps:
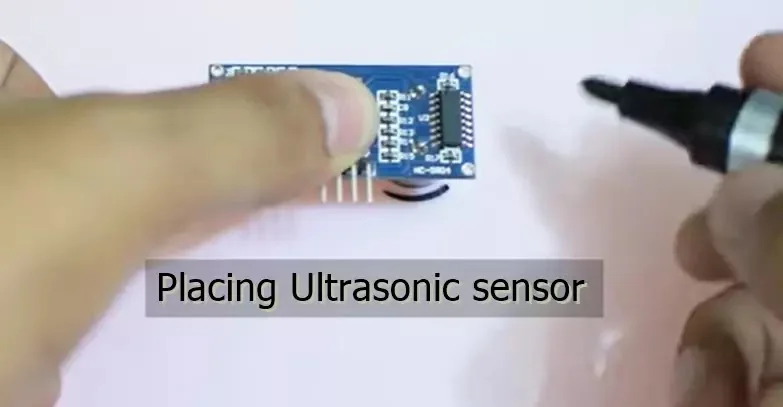
Place the ultrasonic sensor on the top of the dustbin and ensure it is facing forward.
Use the jumper wires to connect the sensor to the Arduino board. Connect the sensor’s ground pin to the Arduino’s ground, the Vcc pin to the 5V pin of the Arduino, the Trig pin to the 9th pin of the Arduino, and the Echo pin to the 8th pin of the Arduino.
Double-check all the connections before proceeding to the next step.
With the sensor now fixed on the dustbin, we can move forward to the project’s final step.
Now drill holes in the dustbin according to the fixed dimension as shown below.

WARNING: It needs force to drill holes, and makes sure that the drill has a sharp knock.
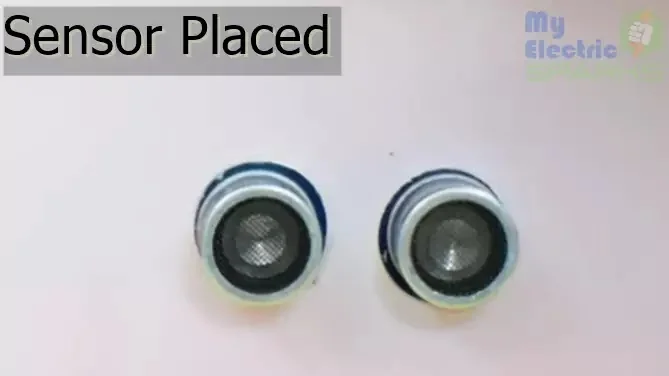
Now fix the ultrasonic sensor, as shown below.
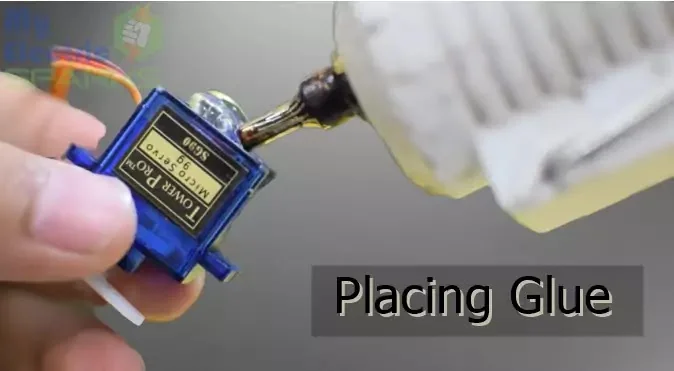
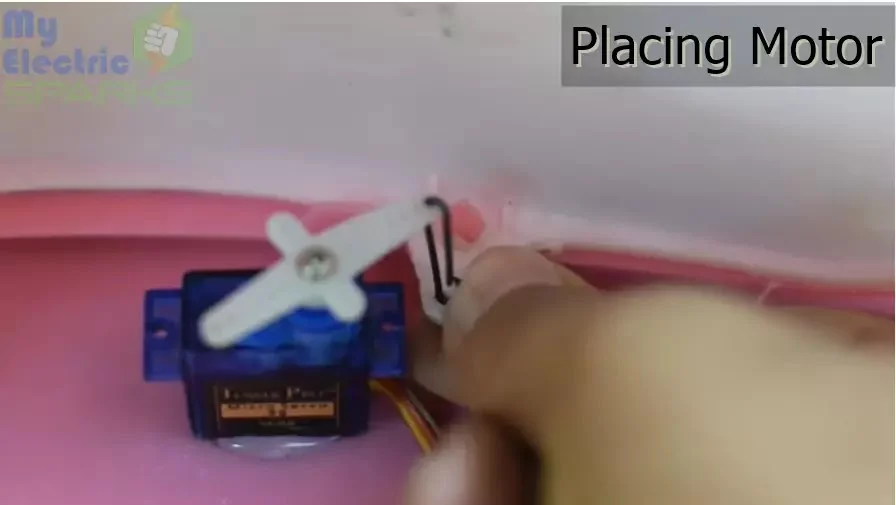
Glue the Servo motor so that it can be fixed permanently.
Mechanism of Servo Motor
Connect the battery

Testing of Smart Dustbin
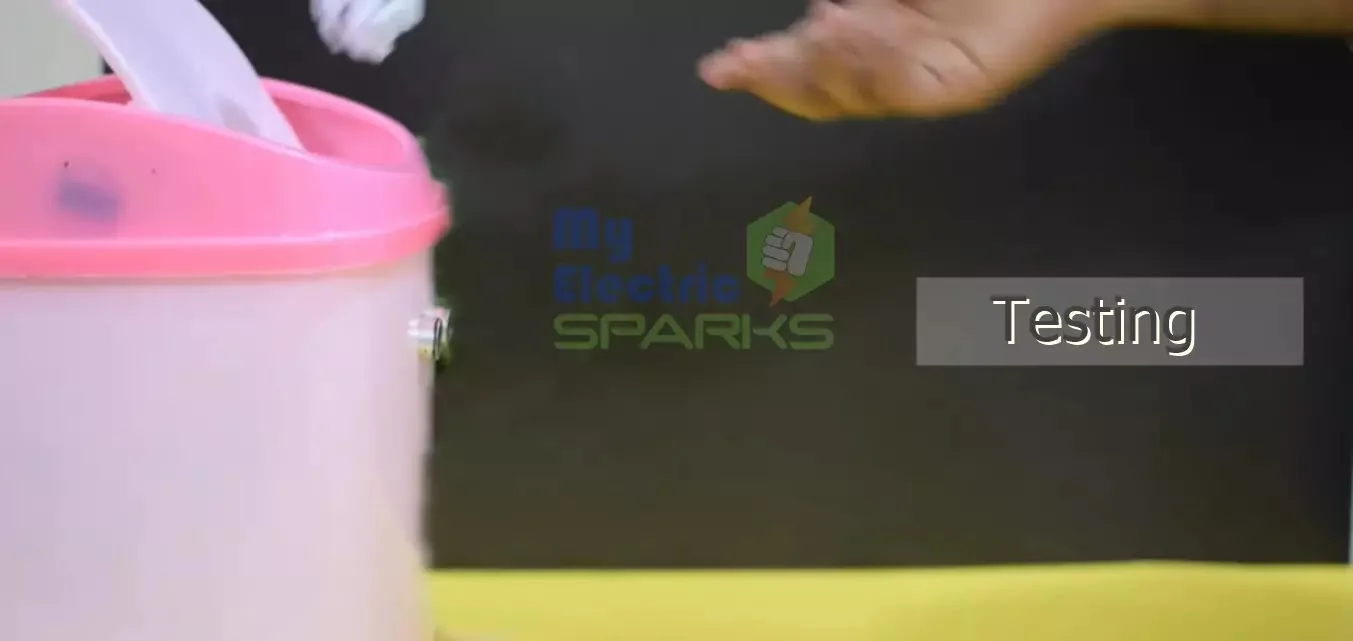
How the Smart Dustbin Works
Once set up and programmed, the smart dustbin works efficiently to make waste disposal hassle-free. After all the necessary connections have been made and the code uploaded to the Arduino, power is supplied to the circuit. The ultrasonic sensor continuously works to detect any object nearby, measuring the distance to check if it is less than the predefined value. If an object is detected, such as a hand or leg of a human being or any other thing, a signal is sent to the motor. The motor is activated, and the head of the dustbin, which is attached to the servo motor, is opened by the Arduino. After a few seconds, the head of the dustbin will automatically close because of the predefined value that can be easily changed. This process ensures that waste disposal is made easy and convenient for everyone.
Suggested: Get a Scientifically Proven Clean with the Dyson V15 Detect Slim
Applications of Smart Dustbin
The smart dustbin has become an innovative solution for efficient waste management. With the advancement of technology, the device has found its application in various fields. According to tech website reviews, “Smart dustbins are an excellent way to reduce the amount of waste that ends up in landfills and promote recycling.” The device can also help reduce the carbon footprint, making it eco-friendly.
A tech expert says, “The smart dustbin is a perfect solution for offices to manage their waste effectively.” The device can store a vast amount of paper, making it ideal for waste management. With its compact size, the intelligent dustbin can also be used in homes, making it a popular choice for households.
Another advantage of the smart dustbin is its affordability. A tech analyst says, “The device is low-cost, and anyone can easily implement it in their homes and offices.” This cost-effectiveness makes it a popular choice for budget-conscious consumers.
The smart dustbin is also essential in public places like parks, shopping malls, and streets. Its automatic opening and closing mechanism makes it a hygienic and convenient option for waste management in these places.
Additionally, the device can be a learning tool for aspiring robotics enthusiasts. According to recent updates, one can also make an obstacle-avoiding robot with the knowledge gained after completing this project.
The smart dustbin is a versatile device with various applications. It is an eco-friendly, affordable, and convenient solution for waste management in households, offices, and public places.
In the end it’s a straightforward and easy-to-implement Smart dustbin project that works with Arduino’s help. When it opens the lid(door) of the dustbin then, it automatically closes the lid, it is due to the waste that should not be exposed to the surrounding, which creates a bad image as well, and it also doesn’t allow flies and other insects to enter the bin. It works fully automatic. You can also work hard to make it more autonomous.
More Stories:
Raspberry Pi vs Arduino: Which Is the Best for Your ProjectDIY Home Automatic Floor Cleaner Robot using Arduino And Ultrasonic Sensor
How to Make Your Own Automatic Hand Sanitizer Dispenser Without Arduino: A Step-by-Step Guide: Build Your Own Smart Dustbin with Arduino and Ultrasonic Sensor for Under $2